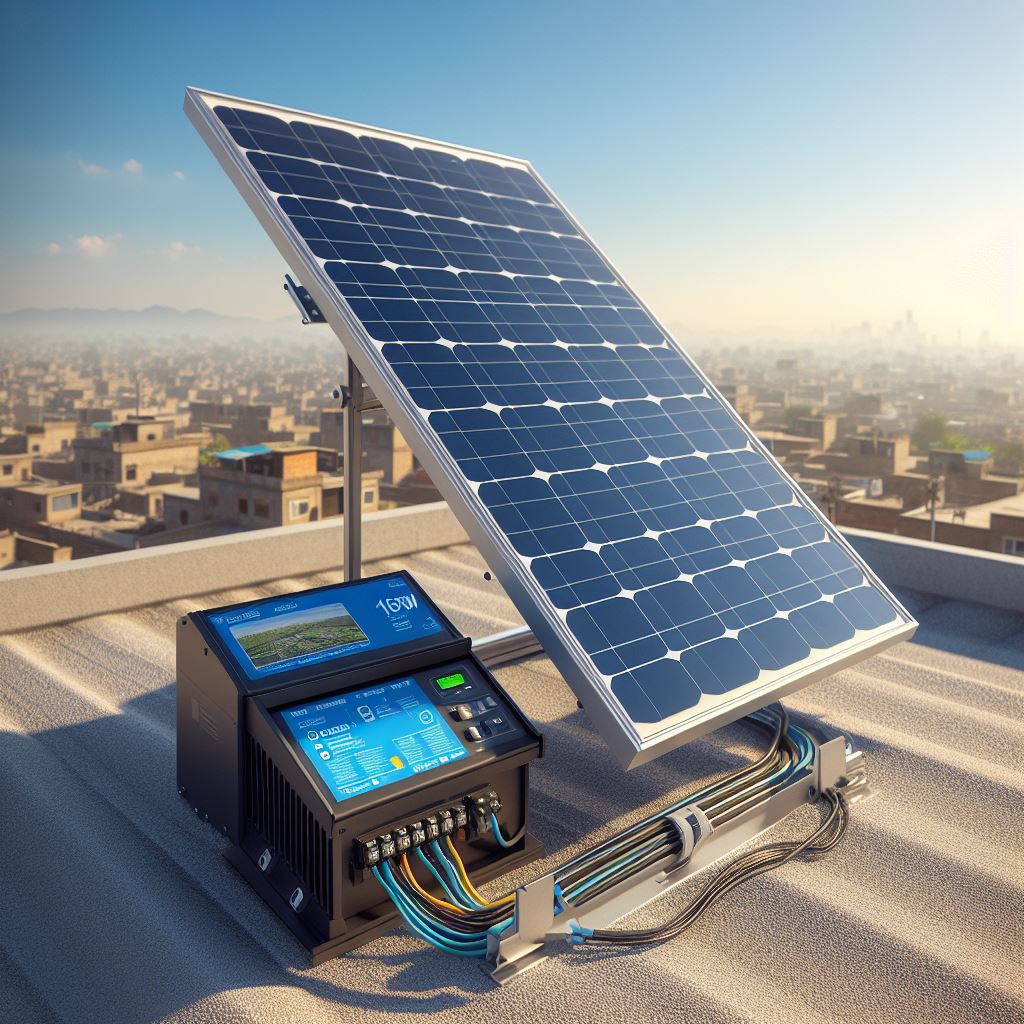
Setting Up 150W Solar Panels! This guide details setting up a 150W solar panel system with a stand, from planning and component selection to installation and maintenance. Learn how to expand your system for greater energy needs and enjoy the benefits of clean, renewable solar power.
Imagine tapping into the sun’s endless energy to power your devices or even your home! This guide unveils the secrets to setting up a compact 150W solar panel system with a stand. Whether you’re a weekend camper seeking phone-charging freedom or aiming to reduce your reliance on the grid, this system offers a practical and rewarding path to clean energy independence. Buckle up and get ready to take charge of your energy consumption!
Planning Your Solar Power Journey
Before diving into the installation process, meticulous planning is paramount. The first step involves meticulously evaluating the location where you intend to install the solar panel. Ideally, this location should receive unobstructed sunlight for the majority of the day. South-facing locations in the Northern Hemisphere or North-facing locations in the Southern Hemisphere typically offer the most optimal sun exposure.
Next, it’s crucial to determine your energy needs. Make a comprehensive list of all the appliances and devices you intend to power with your solar setup. Research the wattage consumption of each device and calculate the total wattage required. This will help you determine the number of 150W panels needed or if a higher wattage panel might be more suitable.
Evaluate the location for solar panel installation.
With a clear understanding of your location and energy needs, it’s time to source the necessary components. For budget-conscious individuals, exploring used or refurbished solar panels can be a viable option. However, ensure the used panels are in good working condition and have a warranty, if possible.
Next, you’ll need a sturdy and durable mounting stand or frame. The type of stand you choose will depend on your mounting location. For ground-mounted setups, a robust, weatherproof stand is essential. Roof-mounted systems require a stand specifically designed for secure roof attachment, ensuring it can withstand wind and other weather elements.
Determine your energy needs (lights, appliances, etc.)
150W solar panels are ideal for small-scale applications, such as charging mobile phones, powering small LED lights, or running low-wattage appliances. If you intend to power devices with a higher wattage requirement, you might need multiple 150W panels or consider a higher wattage panel altogether.
Selecting the right stand is equally important. As mentioned earlier, the type of stand will depend on where you plan to mount your panels. For roof-mounted systems, ensure the stand is compatible with your roof type (e.g., shingle, tile) and meets all local building codes. Ground-mounted setups offer more flexibility in location but require a stand designed for stability and proper tilt adjustment.
Setting Up the Stand for Optimal Performance
Always follow the manufacturer’s instructions for proper assembly of the stand. This typically involves securely connecting the stand components and ensuring all the parts are correctly attached. Once assembled, use a level to ensure the stand is perfectly horizontal. A level stand is crucial for optimal 150W solar panel placement and efficient energy production.
Positioning the Solar Panels for Maximum Sun Absorption
With the stand secured, it’s time to position the solar panels. Place them on the stand, ensuring they face the direction that receives the most sunlight throughout the day. In most cases, this will be a south-facing direction in the Northern Hemisphere or a north-facing direction in the Southern Hemisphere.
Next, adjust the tilt of the panels to capture sunlight at the optimal angle. This angle will vary depending on your location and season. Generally, the optimal tilt angle is roughly equal to your latitude. For instance, if you reside at 40 degrees latitude, tilting your panels at 40 degrees will maximize sunlight absorption. Resources like online solar calculators or consulting with a solar installer can help you determine the most efficient tilt angle for your specific location.
Safety First: Essential Precautions for Installation
Safety should always be your top priority when dealing with electricity. If you’re unsure about any aspect of the electrical connections, it’s highly advisable to seek assistance from a qualified electrician.
While working on the installation, utilize appropriate safety gear. This includes wearing insulated gloves and using tools with insulated handles to prevent potential electrical shocks.
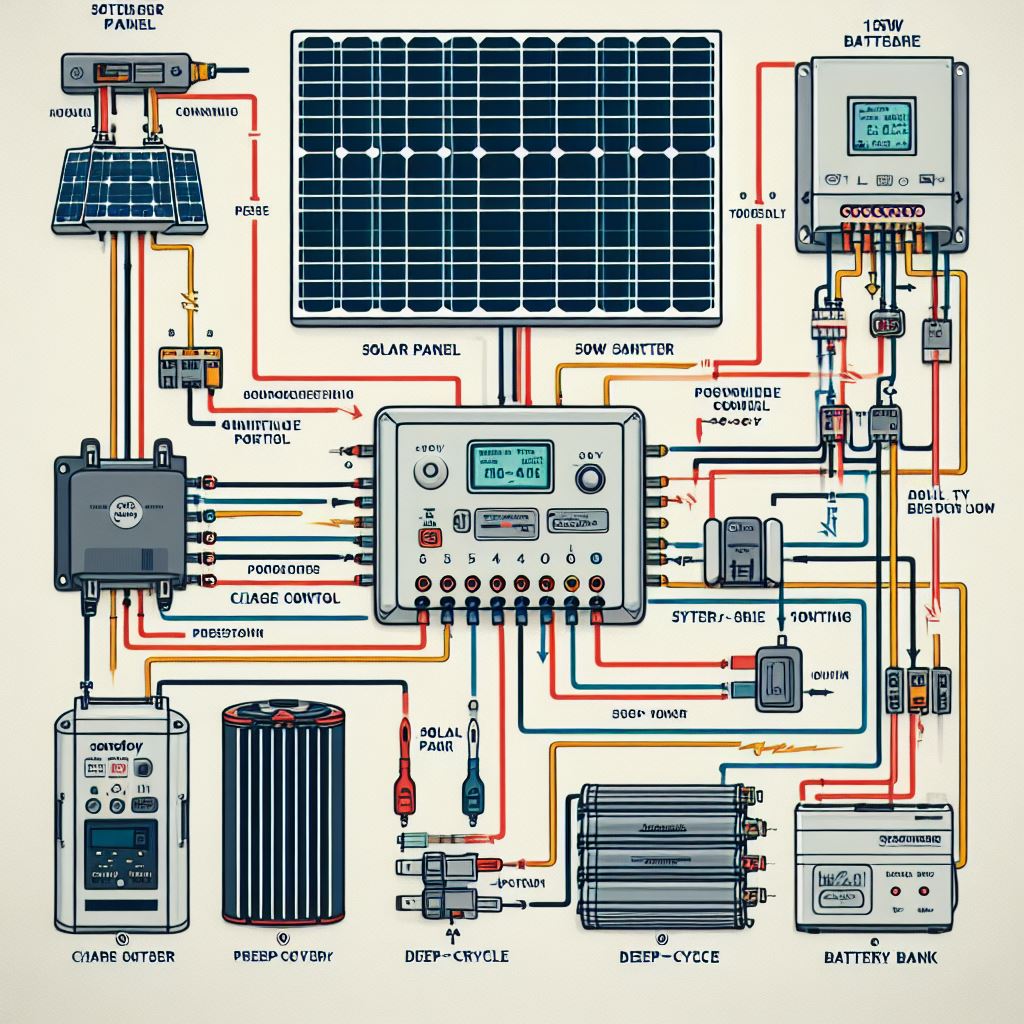
Connecting the System: Charge Controller and Battery Bank
The charge controller plays a vital role in regulating the flow of electricity from the solar panels to the battery bank. Mount the charge controller in a suitable location near the solar panels, ensuring it’s protected from the elements.
Once the charge controller is mounted, connect the solar panels to it using the appropriate cables. The specific wiring configuration will depend on your system setup, so consult the manufacturer’s instructions for your charge controller and panels. Typically, these connections involve positive and negative terminals, and proper polarity is crucial to ensure safe and efficient operation.
The next step involves connecting the charge controller to the battery bank. The battery bank is where the electricity generated by the solar panels will be stored for later use. Deep-cycle batteries, specifically designed for frequent charging and discharging cycles, are the ideal choice for solar power systems. When connecting the battery bank to the charge controller, ensure proper polarity is maintained. Positive terminals should connect to positive terminals, and negative terminals should connect to negative terminals. Loose or incorrect connections can lead to damage to the system or even safety hazards.
Inverter: Converting DC to AC Power
An inverter is an essential component if you intend to utilize the solar-generated electricity to power AC (alternating current) appliances and devices in your home. The inverter converts the DC (direct current) electricity produced by the solar panels into AC electricity, making it compatible with your standard household appliances.
Choose an inverter with a capacity that can handle the total wattage of the appliances you plan to power simultaneously. Locate a suitable and well-ventilated indoor location for the inverter installation. Once positioned, connect the inverter to the battery bank using the designated cables, ensuring proper polarity.
Quality Check and Power Up!
Before turning on the system, it’s crucial to perform a thorough quality check. Visually inspect all connections to ensure they’re secure and properly fastened. Double-check the polarity of all wire connections, especially at the charge controller, battery bank, and inverter.
Once confident in the connections, you’re ready to test the system! Turn on the inverter and monitor the system’s output using the inverter’s display or a dedicated monitoring system (if applicable). The output should reflect the current generated by the solar panels.
Maintaining Your Solar Power System for Optimal Performance
Regular maintenance is vital to ensure your 150W solar panel system operates at peak efficiency. Cleaning the solar panels periodically is essential to remove dust, dirt, or debris that can obstruct sunlight absorption. A simple cleaning with water and a soft cloth should suffice in most cases.
Furthermore, it’s recommended to monitor the system’s performance regularly. This involves checking the battery bank’s voltage levels and the overall power output of the solar panels. Many inverters and charge controllers come equipped with built-in monitoring systems that provide valuable insights into the system’s health.
Adding More Panels:
If your initial 150W setup proves insufficient for your power requirements, adding more panels is a straightforward solution. The key lies in ensuring compatibility. Choose panels with the same voltage and amperage ratings as your existing 150W panel. This simplifies wiring and ensures the system functions seamlessly.
Upgrading the Charge Controller:
As you add more panels, the capacity of your charge controller might become insufficient. The controller needs to handle the increased current generated by the additional panels. Consult the specifications of your current controller and choose a new one with a higher amperage rating to accommodate the expanded system.
Inverter Considerations:
Similar to the charge controller, your inverter’s capacity might need an upgrade if you plan to power more appliances with the additional solar power. Select an inverter with a wattage rating that surpasses the total wattage of the devices you intend to run simultaneously. This ensures the inverter doesn’t overload during peak usage periods.
Battery Connection
With a larger solar panel array, you’ll likely require a bigger battery bank to store the increased electricity generation. Deep-cycle batteries come in various capacities, so choose additional batteries that complement your existing setup and provide sufficient storage for nighttime or cloudy days. Remember to maintain proper system voltage by adding batteries with the same voltage rating as your existing bank.
Parallel and Series Connections:
When expanding your system, understanding parallel and series connections is crucial. Connecting panels in parallel increases the overall current (amperage) of the system while maintaining the same voltage. Conversely, connecting panels in series increases the overall voltage while keeping the current the same.
Choosing the right connection method depends on your existing system and desired outcome. Consulting a qualified electrician or solar installer can help you determine the optimal connection configuration for your specific setup.
Safety First, Always:
As your system grows in complexity, safety remains paramount. Always adhere to electrical safety guidelines and utilize insulated tools while working on the connections. If you’re unsure about any aspect of the expansion process, don’t hesitate to seek assistance from a professional.
FAQ
Is it OK to stand on solar panels?
No, it is not okay to stand on solar panels. Solar panels are delicate and can be damaged by weight or pressure. Walking or standing on them can crack the glass surface or damage the electrical components underneath. This can not only reduce their efficiency but also pose a safety hazard.
What size solar controller do I need for a 150W solar panel?
The size of the solar controller you need depends on the amperage (amps) of your 150W solar panel, not just the wattage. Typically, a 150W solar panel will have a current output around 6-8 amps. To choose the right controller, you’ll need one with a current rating slightly higher than the maximum current your panel can produce. So, for a 150W panel with a possible output of 8 amps, a 10 amp solar controller would be suitable.
Can I have a standalone solar system?
Yes, you can have a standalone solar system, also known as an off-grid system. This type of system is not connected to the national grid and relies solely on the energy generated by your solar panels. It typically includes a battery bank to store excess energy for nighttime or cloudy days. Standalone systems are ideal for remote locations or situations where grid connection is unavailable.
How many amps should a 150 watt solar panel produce?
The amperage (amps) of a 150W solar panel depends on the voltage (volts) of the panel. Solar panels typically operate at either 12 volts (V) or 24V. To calculate the amps, you can use the following formula: Amps = Watts (W) / Volts (V). For example, a 150W, 12V solar panel would produce around 12.5 amps (150W / 12V).
Can I have solar panels not connected to the grid?
Yes, as mentioned earlier, you can have solar panels not connected to the grid. This is an off-grid system. While it offers independence from the national grid, it requires careful planning and sufficient battery storage to ensure you have enough power throughout the day and night.
Conclusion:
Installing a solar panel system can be a transformative experience. The satisfaction of generating your own clean energy, coupled with the potential for cost savings and the positive environmental impact, makes solar power a compelling choice for homeowners. Remember, the information provided in this guide is for general informational purposes only. Always consult with qualified professionals, such as electricians and solar system installers, to ensure your system is designed, installed, and connected to the grid safely and in accordance with all local regulations. With careful planning, the right tools, and a commitment to sustainability, you can embark on your solar journey and unlock the power of the sun for your home.